Cat ears flat is a timeless trend that never seems to go out of style. Whether you’re attending a cosplay event, a music festival, or just want to add some flair to your everyday look, cat ears are an instant attention-grabber. However, getting them to stay put and looking flawless can be a challenge many of us face. If you’re tired of dealing with awkwardly positioned ears or struggling to find the right materials for your feline-inspired accessory, you’re in luck! Our expert guide is here to share the secrets of achieving stunning cat ears flat.
In this article, we’ll delve into styling tips and tricks that will help you master the art of creating seamless and secure cat ears. We’ll also explore various material options and maintenance advice to ensure your feline headband stays looking its best all day long.
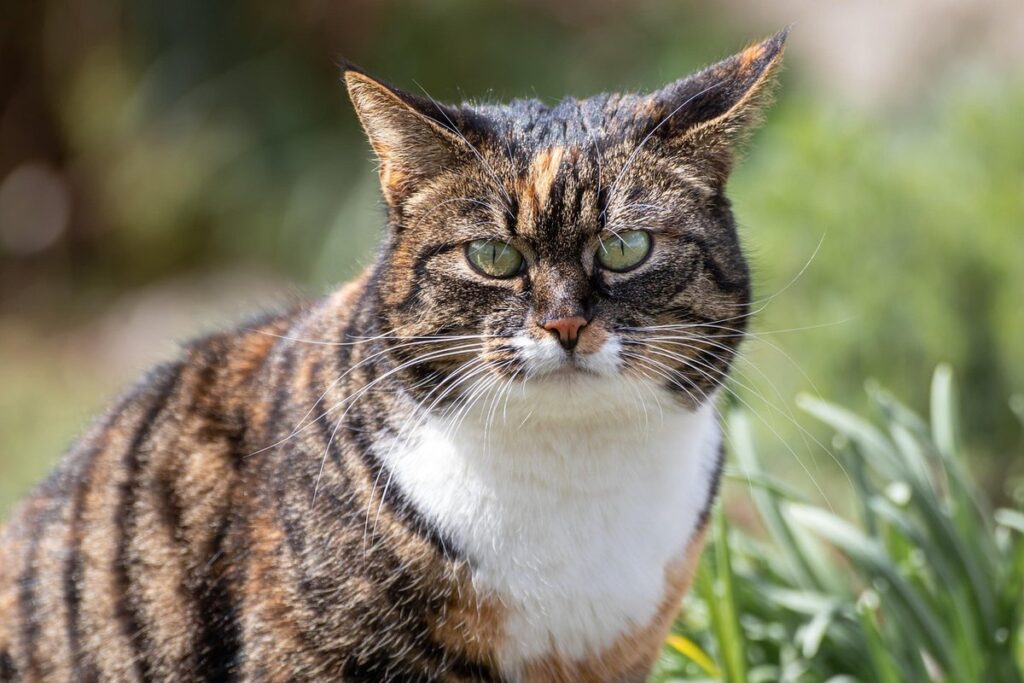
What Are Cat Ears and Why Do They Flatten?
You might be wondering what exactly causes those adorable feline ears to lay flat against a cat’s head, and that’s precisely what we’ll dive into next. Let’s explore the science behind it.
The History of Cat Ears in Fashion
Cat ears have been a staple in fashion for decades, with their origins dating back to the 1960s and 1970s. During this time, designers like Mary Quant and Pierre Cardin experimented with bold and futuristic designs that often featured cat-like features, including ears. The trend gained momentum in the 1980s, particularly among the punk and goth subcultures, where it was used as a way to express rebellion and nonconformity.
Fast forward to the 21st century, and cat ears have become a ubiquitous fashion accessory. From streetwear to high-end couture, designers are incorporating cat-like elements into their designs. The trend has been fueled by social media platforms like Instagram and TikTok, where users can share and discover new styles and trends in real-time.
Today, cat ears come in a variety of shapes, sizes, and materials, from glittery headbands to chunky earrings. Whether you’re looking for a bold statement piece or a subtle nod to the trend, there’s a style to suit every taste. So why not give it a try? Experiment with different styles and find what works best for you – after all, fashion is all about expressing yourself!
Understanding the Causes of Flat Cat Ears
When it comes to flat cat ears, there are several common issues that can lead to this unfortunate fate. One of the most obvious culprits is improper styling. If you’re using excessive heat tools or applying too much tension on the ears while styling, you may be causing permanent damage.
Low-quality materials can also contribute to flat cat ears. Cheaply made ear pads or headbands can lose their shape quickly, leading to a flat appearance. Even high-quality materials can become misshapen if not cared for properly. Regular cleaning and storage of your cat’s ear accessories can help prevent flattening.
Another factor that might lead to flat cat ears is wearing them too frequently without giving them a break. Constant wear can cause the materials to stretch or lose their natural shape. Try to limit wear time, especially during peak heat or humid months when ears are more prone to flattening.
Remember, prevention is key. Regularly check your cat’s ear accessories for signs of wear and tear, and replace them if necessary.
Choosing the Right Cat Ears Style for You
When it comes to cat ears, you want a style that fits your personality and aesthetic perfectly. Here’s how to choose a pair that suits you best.
Picking the Perfect Size: A Guide for Different Face Shapes
When it comes to cat ears flat, getting the right size is crucial to pull off the look without overwhelming your face. The ideal size depends on your individual face shape and personal preferences.
For oval-shaped faces, you can opt for larger cat ears as they tend to balance out the features. For instance, if you have a petite nose, oversized cat ears will create a striking contrast that adds visual interest. Conversely, round faces look best with smaller cat ears, which prevent them from overwhelming your features.
Square-shaped faces, on the other hand, benefit from softer, more delicate designs. This can include smaller or asymmetrical cat ears to counterbalance sharp angles. Similarly, angular features can be softened by choosing cat ears with rounded edges.
To determine the perfect size for your face shape, consider the following:
* If you have a prominent forehead, choose cat ears that are slightly larger than your brow bone.
* For heart-shaped faces, balance out the narrow chin with oversized or statement cat ears.
* Avoid overwhelming petite features by choosing cat ears that are proportional to your nose and mouth.
Material Matters: Synthetic vs. Fabric vs. Velvet Cat Ears
When it comes to choosing the right cat ears style for you, material matters. The type of material used can greatly impact the comfort, durability, and overall look of your feline headpiece. Let’s break down the pros and cons of synthetic, fabric, and velvet cat ears.
Synthetic materials like polyester or nylon are often lightweight, easy to clean, and quick-drying. They’re a great option for active wearers who want a hassle-free experience. However, some people may find them too stiff or prone to shedding.
Fabric cat ears, on the other hand, offer a softer, more breathable alternative. They can be made from cotton, velvet, or even faux fur, and often have a more natural look and feel. But they might require more maintenance, as they can be prone to wrinkles or snagging.
Velvet cat ears are a luxurious option that adds a touch of sophistication to any outfit. They’re soft to the touch and often feature intricate details like embroidery or rhinestones. However, velvet can be delicate and may require dry cleaning, which can add extra cost.
Ultimately, the choice between synthetic, fabric, and velvet cat ears comes down to your personal preferences and lifestyle. If you prioritize ease of care, synthetic might be the way to go. For a softer, more natural look, fabric is a great option. And if you want to make a statement with luxurious details, velvet is the perfect choice.
Preparing Your Hair for a Flawless Fit
Before you slip into those adorable cat ears, make sure your hair is tangle-free and securely fastened to ensure a perfect fit and prevent any pesky stray hairs from getting in the way.
How to Prep Your Hair for Cat Ears: A Step-by-Step Guide
Prepping your hair for cat ears is a crucial step to ensure a flawless fit and a comfortable wear. Start by washing your hair with a gentle shampoo and conditioner to remove any product buildup. Towel-dry your hair until it’s damp, but not soaking wet.
Next, use a detangling spray or conditioner to gently comb out any knots or tangles, especially around the crown area where the cat ears will sit. You can also use a wide-tooth comb or a detangling brush to minimize breakage and snagging.
For added hold and texture, apply a light-hold hairspray or a texturizing spray to your hair, focusing on the areas where the cat ears will be attached. This will help keep your hair in place and prevent it from getting crushed by the earpieces.
Finally, use a small amount of dry shampoo at the roots to add extra grip for the adhesive strips or clips that come with most cat ear headbands. This will ensure a secure fit and prevent any slipping or sliding during wear.
Common Mistakes to Avoid When Wearing Cat Ears
When wearing cat ears, it’s easy to get caught up in the excitement of the moment and overlook some crucial details. To ensure a flawless fit, you’ll want to avoid these common mistakes:
Incorrect placement is one of the most common pitfalls when wearing cat ears. This can happen if you don’t align the ears with your natural hairline or if they’re too far forward or back on your head. To avoid this, gently press the ears against your forehead and adjust them as needed until they feel secure. You can also try using a little bit of hairspray to keep them in place.
However, be careful not to overdo it with the hairspray – excessive use can weigh down the ears and cause them to sag or even damage your hair. Instead, lightly spritz a small amount directly onto the ear bases for a secure hold without weighing them down. By being mindful of these simple details, you’ll be well on your way to pulling off the perfect cat ear look!
Styling Your Cat Ears Flat: Tips and Tricks
If you’re struggling to style your cat ears flat, don’t worry – we’ve got some helpful tips and tricks to get you looking fabulous in no time. From basic styling to advanced techniques, we’ll cover it all.
Techniques for Creating a Seamless Fit
Achieving a seamless fit between the cat ears and hair is crucial for creating a convincing and comfortable look. One of the most common mistakes when styling cat ears flat is having them slip out of place due to excessive hair volume or uneven edges.
To prevent this, start by preparing your hair with a smoothing product, such as a serum or cream, to minimize frizz and add shine. This will help the hair lie flat against the skin, creating a smooth surface for the cat ears to adhere to. When placing the ears, gently pat them into position rather than pushing or tugging on the edges.
Another trick is to use bobby pins to secure any stray hairs or flyaways that may be poking out from under the ears. This will create a clean and polished finish that’s perfect for everyday wear. For special occasions or photoshoots, consider using a hair adhesive spray or glue specifically designed for prosthetics to keep your cat ears in place all day long.
How to Prevent Slipping or Falling Out of Place
When it comes to styling cat ears flat, one of the biggest concerns is making sure they stay in place throughout the day. After all, there’s nothing worse than having your beautifully styled ears fall out mid-concert or photoshoot! To prevent slipping or falling out of place, you’ll want to use some specialized adhesives or tapes designed specifically for this purpose.
One popular option is double-sided tape, which can be applied discreetly under the cat ear headband. This type of tape is gentle on skin and won’t leave any residue when removed. Another great option is adhesive strips, such as those made by Cosplay Tape or Hot Stuff. These are specifically designed for cosplay and costume use and come in a variety of strengths to suit your needs.
Before applying any adhesives, make sure to clean the area thoroughly with makeup remover to ensure a strong hold. For added security, you can also use a small amount of hairspray to set the ears in place. With these tips and tricks, you’ll be able to rock your cat ears flat all day long without worrying about them falling out!
Maintaining Your Cat Ears: Cleaning, Storage, and Longevity
To keep your cat ears looking their best, it’s essential to clean them regularly and store them properly when not in use. This section shares expert tips on maintenance and longevity.
Best Practices for Cleaning Your Cat Ears
Cleaning your cat ears requires care and attention to detail. To prevent damage and extend their lifespan, it’s essential to follow a step-by-step guide. First, gather the necessary materials: cotton balls or soft cloths, ear cleaning solution specifically designed for cats, and a pair of tweezers.
Begin by gently lifting the outer ear to access the ear canal. Using a cotton ball or soft cloth, apply a small amount of ear cleaning solution directly into the ear canal. Do not insert the cotton ball or use your fingers to clean deeper into the ear as this can cause damage.
Next, massage the base of the ear to help spread the solution and loosen any debris. Use tweezers to carefully remove any visible dirt or wax from the outer ear. Avoid inserting anything too far into the ear canal, including the cleaning solution, as this can lead to infection.
Remember to clean your cat’s ears regularly, ideally once a week, but more often if they’re prone to ear issues. Always supervise your cat during the cleaning process and reward them with treats for their cooperation.
Tips for Storing and Traveling with Your Cat Ears
When you’re not wearing your cat ears, it’s essential to store them properly to maintain their shape and longevity. First, make sure they are completely dry before storing to prevent moisture buildup. You can use a soft cloth or let them air-dry.
For storage, consider investing in a hard case or a velvet pouch specifically designed for cat ears. These will protect your ears from dust, scratches, and crushing. If you don’t have one, you can also store them in a soft, ventilated bag to prevent moisture accumulation.
When traveling with your cat ears, pack them securely in a protective case or bag to avoid damage. You may also want to consider shipping them in their original packaging if you’re buying online. To keep them clean while on-the-go, use a microfiber cloth and gently wipe away any dust or debris that accumulates during transport.
Remember to handle your cat ears with care, as they are delicate and can be damaged easily. Avoid exposing them to extreme temperatures, humidity, or direct sunlight for extended periods. By following these simple storage and travel tips, you’ll ensure your cat ears stay in great condition when not in use.
Conclusion: Mastering the Art of Cat Ears Flat
Now that you’ve mastered the techniques and tricks for creating cat ears flats, let’s summarize what you’ve learned so far. We’ll review key takeaways from this guide.
Recap of Key Takeaways
As you’ve made it to the end of this comprehensive guide on mastering the art of cat ears flat, we hope you feel more confident and equipped to tackle this popular hairstyle with ease. Let’s recap the key takeaways from our discussion so far.
Firstly, understanding the fundamentals of cat ears flat is crucial. We discussed the importance of starting with clean, damp hair and using a wide-tooth comb or your fingers to detangle it gently. This sets the stage for smooth, sleek styling that lasts all day long.
When it comes to creating the signature “cat ear” look, we emphasized the significance of sectioning off small parts of hair from the face and styling them upwards with some product. This not only adds a touch of whimsy but also helps frame the face beautifully.
To keep your cat ears flat looking fabulous all day, remember to set it with hairspray or dry shampoo. These secret weapons will ensure that even after multiple hours, your style stays intact without any frizz or flyaways in sight. By incorporating these tips into your daily routine, you’ll be well on your way to mastering the art of cat ears flat and unlocking a world of effortless, cool-girl beauty.
Final Tips for Achieving Perfection with Your Cat Ears Flat
As you near perfection with your cat ears flat, remember that consistency is key. Set aside dedicated time each week to practice and refine your skills. Make it a habit by incorporating it into your daily routine, even if it’s just for 10-15 minutes.
It’s also crucial to be patient with yourself and acknowledge the small victories along the way. Focus on making incremental improvements rather than striving for perfection from the start. You’ll find that your ear placement, angle, and overall aesthetic will become more natural and effortless over time.
To ensure you’re not getting stuck in a rut, challenge yourself by trying out new products or techniques. Experiment with different hair textures, styles, and accessories to add some flair to your look. For instance, try using a curling iron to add subtle waves or use a cat ear headband for an effortless touch. Don’t be afraid to step out of your comfort zone and take calculated risks – it’s all part of the journey to mastering the art of cat ears flat.
Frequently Asked Questions
What if I have a sensitive scalp, can I still wear cat ears flat?
You can still enjoy the fashion trend with a sensitive scalp. Look for hypoallergenic materials or opt for soft, breathable fabrics that won’t irritate your skin. Consider using a gentle adhesive remover to clean up any residue without causing discomfort.
How often should I clean my cat ears to maintain their quality?
Regular cleaning is essential to maintaining the longevity of your feline headband. Aim to clean them every 2-3 uses or when you notice visible dirt buildup. Follow best practices for cleaning, which typically involve a gentle soap solution and soft cloth.
Can I wear cat ears flat with long hair? How do I prep my locks?
Long hair can be a bit more challenging, but don’t worry – it’s not impossible! Prep your locks by brushing or combing them back to prevent any tangles or knots from getting in the way. Secure your hair with clips or pins if needed.
Will cat ears work for all face shapes? What about those with smaller features?
While cat ears are versatile, they might require some adjustments for smaller faces. Consider opting for smaller-sized ears or exploring different styles that cater to your unique facial features. Experiment and find what works best for you!
How do I prevent my cat ears from slipping out of place during wear? Are there any tricks to keep them secure?
To prevent slippage, make sure your hair is prepared properly (as we discussed in a previous step). You can also use a gentle adhesive or hairspray to help keep the ears in place. For added security, try using bobby pins or tiny hair ties to anchor the ears firmly.
Can I store my cat ears flat when not in use? What’s the best way to pack them for travel?
Yes! Proper storage will help maintain their shape and extend their lifespan. Store your feline headband in a protective case or pouch, ensuring they don’t come into contact with other items that might cause damage. For traveling, consider packing a small cloth bag or wrap each ear individually in tissue paper to prevent creasing.
How often should I replace my cat ears if they start to show signs of wear?
Don’t be too attached – it’s time to upgrade when your feline headband starts showing visible signs of wear! Typically, this occurs after 5-10 uses or when the material begins to degrade. Keep an eye out for fraying, discoloration, or excessive shedding, and replace them as needed to ensure a flawless fit.