Creating a DIY cat tree for your home is a great way to provide your feline friend with a happy and healthy environment. Cats love to climb, scratch, and perch themselves in elevated spots, making a custom-built cat tree a must-have for any cat owner. Not only does it give them a sense of security and comfort, but it also helps keep their nails trimmed and saves your furniture from damage.
In this comprehensive guide, we’ll walk you through the process of building a custom cat tree using simple materials and providing valuable design tips along the way. We’ll also cover essential maintenance advice to ensure your DIY project remains sturdy and clean for years to come. With our expert guidance, you can create a beautiful and functional cat tree that suits your home decor and meets your feline’s needs, all on a budget-friendly DIY project.
Introduction
Let’s get started on building the purrfect DIY cat tree for your feline friend, and I’ll guide you through every step of the process.
Benefits of DIY Cat Trees
Building a DIY cat tree can be a game-changer for you and your feline friend. Not only is it cost-effective, but it also offers endless customization options to suit your cat’s unique personality and preferences.
First and foremost, a DIY cat tree saves you money. By upcycling materials or repurposing items you already have at home, you can create a sturdy and stylish cat tree without breaking the bank. According to a survey by the American Pet Products Association (APPA), the average cost of a pre-made cat tower is around $100-$150. In contrast, building your own DIY cat tree with recycled materials can cost as little as $20-$50.
Moreover, when you build a DIY cat tree, you have complete control over its design and features. Want to include scratching posts, hideaways, or climbing structures? No problem! Simply get creative and add the elements that will make your cat’s experience truly special.
Importance of Cat Exercise and Stimulation
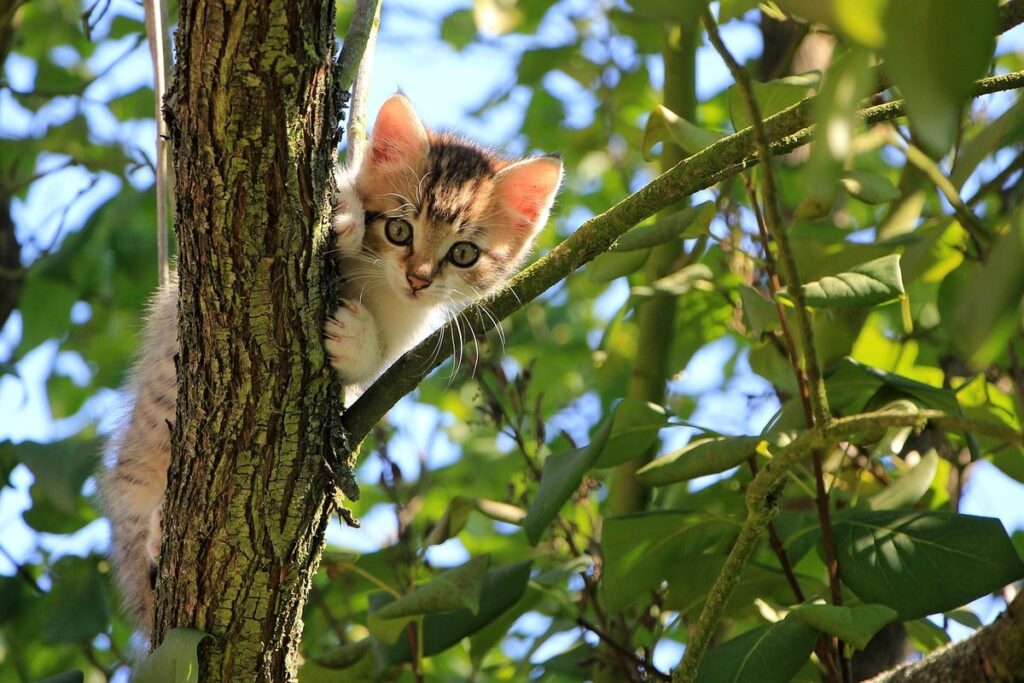
Providing cats with vertical space and climbing structures is crucial for their overall well-being. Just like humans, cats need regular exercise to maintain physical health, prevent obesity, and reduce the risk of chronic diseases such as diabetes and heart disease. By offering a cat tree or other climbing structure, you’re encouraging your feline friend to engage in natural behaviors like hunting, pouncing, and scratching.
This vertical space also serves as a mental stimulation outlet for cats, helping to alleviate boredom, stress, and anxiety. Cats that don’t receive adequate physical and mental stimulation may resort to destructive behavior, such as scratching furniture or knocking over objects. By incorporating cat trees into your home, you’re providing a safe and healthy outlet for these behaviors.
Incorporating cat exercise and stimulation is easy – simply place the cat tree in an area where your cat spends most of its time, making it easily accessible to them at all times. For example, placing the cat tree near a window allows your cat to climb up and observe the outdoors while getting some much-needed exercise.
Overview of the Project
As you embark on building your very own DIY cat tree, it’s essential to have a clear understanding of what you’re getting yourself into. Before we dive into the nitty-gritty details of designing and constructing your feline friend’s new favorite hangout spot, let’s take a step back and look at the big picture.
A typical cat tree project involves several components, including the base, vertical posts, horizontal perches, and perhaps some hidden compartments or toys for entertainment. Depending on your design, you may also need to incorporate sturdy supports, shelves, or scratching posts. Don’t worry if this seems overwhelming – with a little creativity and planning, you’ll be well on your way to creating a purrfect haven for your kitty.
To get started, take stock of the space where your cat tree will reside, considering factors like floor space, ceiling height, and any nearby obstacles or windows. Think about your cat’s preferences too – do they enjoy climbing high or lounging low? By taking these details into account, you’ll be able to craft a cat tree that truly meets their unique needs and personality.
Materials Needed
Before you start building your DIY cat tree, let’s go over the materials needed to ensure a fun and stress-free project. Gather these essential items to get started!
Essential Components
To build a basic DIY cat tree, you’ll need to gather some essential components. At the foundation of this project is wood, which will provide the structure and support for your cat’s climbing and lounging areas. You can use plywood or MDF boards, depending on their durability and affordability.
Next, choose a suitable carpet material that’s gentle on paws yet easy to clean. Consider using sisal rope, felt pads, or even an old blanket – just make sure it’s securely attached to the wood frame with screws or nails. For added stability, you’ll also need some sturdy screws to assemble the components and attach any shelves or perches.
Don’t forget to pick up a drill, a screwdriver, and a measuring tape to help you accurately cut and assemble the pieces. Additionally, you may want to have some wood glue on hand in case you need to reinforce any joints or seams. With these basic materials, you can create a sturdy and comfortable cat tree that will provide your feline friend with hours of entertainment and relaxation.
Optional Features
When it comes to building a DIY cat tree, you may want to consider adding some extra features that will make it even more appealing and functional for your feline friend. One idea is to incorporate shelves where your cat can lounge and observe its surroundings. These shelves can be placed at different levels to create multiple perches for your cat to explore.
You could also add scratching posts made from sturdy materials like sisal rope or carpet. Cats love to scratch, and having a designated area will help preserve your furniture. Another option is to include hideaways or tunnels where your cat can retreat and feel secure. These can be made from cardboard boxes or PVC pipes, depending on your preference.
Remember, the key is to tailor the features to your cat’s personality and needs. If your cat loves to climb, you may want to add more perches or shelves. If it likes to scratch, make sure to include sturdy scratching posts. With a little creativity, you can create a custom DIY cat tree that meets your cat’s unique requirements.
Safety Precautions
When working on your DIY cat tree project, it’s essential to prioritize the safety of both you and your feline friend. To achieve this, ensure that you’re using non-toxic materials throughout the construction process.
Opt for materials that are free from chemicals and dyes, such as pine or fir wood, instead of pressure-treated lumber. These options not only provide a safer environment but also contribute to a healthier indoor air quality. Always check the labels on your chosen materials, and if in doubt, opt for natural alternatives.
Another critical aspect is stability – the final product must be secure and sturdy enough to withstand your cat’s movements. To achieve this, use screws instead of nails, which can loosen over time. Also, ensure that all parts are securely attached and won’t topple or collapse under your cat’s weight. Consider adding a wide base or legs for extra stability.
Additionally, keep in mind the placement of your DIY cat tree. Position it away from any heat sources, electrical outlets, and fragile items to prevent accidents. By following these safety guidelines, you’ll create a secure and safe haven for your feline companion to enjoy.
Design and Planning
Now that you’ve chosen a design concept, let’s dive into the nitty-gritty of creating your DIY cat tree – planning out the materials and structure.
Choosing the Right Design
When it comes to building a DIY cat tree, choosing the right design is crucial for creating a space that your feline friend will love and use frequently. There are several common cat tree designs to consider, each with its own unique benefits.
A-frame cat trees are perfect for small spaces and can be easily customized to fit any room’s décor. They’re also great for multi-cat households, as they provide separate perches for each cat to claim their own territory. For example, you could create an A-frame design with two levels of perches and a sturdy base for stability.
Corner cat trees are ideal for homes with limited floor space, as they make the most of unused corners. They often feature multiple levels and can be designed to fit snugly into a corner, making them perfect for small apartments or condos. Another popular option is multi-level structures, which provide cats with ample opportunities for climbing, scratching, and lounging.
Consider your cat’s preferences and needs when choosing a design – does your kitty love to climb? A multi-level structure might be the way to go. Are you short on space? An A-frame or corner cat tree could be the perfect solution.
Measuring and Calculating Materials
When designing a custom cat tree for your home, it’s essential to measure your space accurately and calculate the materials you’ll need. To start, take precise measurements of the area where the cat tree will reside. Consider the width, length, and height of the space, as well as any doorways or hallways the cat tree may pass through.
To determine the ideal dimensions for your cat tree, think about the size of your cats and how they’ll use the structure. A general rule of thumb is to plan for a minimum of 2-3 feet in width and 4-6 feet in height. This will provide ample space for your cats to climb, play, and relax.
To calculate material requirements, consider the design you have in mind. For example, if you’re building a cat tree with multiple levels, you’ll need more materials than a simple single-level design. A good starting point is to estimate 1-2 square feet of material per level, depending on the complexity of the design and the thickness of the materials used.
Don’t forget to account for support structures like shelves or ledges, which can add extra material needs. With these calculations in mind, you’ll be well-prepared to create a sturdy and functional cat tree that meets your cats’ needs and fits perfectly into your home’s decor.
Incorporating Hiding Places and Tunnels
When it comes to incorporating cozy hiding places and tunnels into your DIY cat tree design, there are several ways to add feline appeal. Cats love to retreat to a safe and secluded spot where they can observe their surroundings without being seen. This is why adding hideaways and tunnels to your cat tree can be a game-changer.
To get started, consider using cardboard boxes or PVC pipes as tunnel materials. These are inexpensive and easy to work with, allowing you to create complex tunnel systems that cater to different types of cats. You can also add windows or openings in the tunnel walls for added visibility.
When designing your cat tree’s hiding places, think about creating multiple levels and perches. This will allow your cat to choose where they want to hide or observe from. For example, you could create a lower level with hidden alcoves beneath the main structure, providing your cat with an escape route when needed.
Building the Cat Tree
Now that you have a plan for your cat tree, it’s time to start building! This section will walk you through the step-by-step process of assembling and customizing your DIY cat tree.
Assembling the Frame
When assembling the frame of your cat tree, it’s essential to focus on stability and structural integrity. You can use wood, MDF, or even PVC pipes as your primary material. For a sturdy base, start by constructing a square corner joint using 2x4s or similar lumber. This will provide a solid foundation for your cat tree.
To ensure accurate measurements, lay out the pieces on the floor before cutting. Use a tape measure and a pencil to mark the cuts, and always double-check your dimensions. When assembling the frame, apply wood glue to each joint and secure with screws or nails. For added stability, consider adding diagonal supports between the legs of the base.
Remember, a well-constructed frame will provide a comfortable and safe perch for your feline friend. As you work on building the frame, think about the size and shape of your cat tree. Will it be tall and slender or short and wide? The frame should accommodate the weight of the cat tree’s components and support the climbing surface, shelves, and perches.
Adding Carpeting and Textures
When it comes to adding carpeting and textures to your DIY cat tree, you have several options to choose from. One popular method is to use sisal rope, which provides a sturdy and durable surface for cats to scratch on. To attach the sisal rope, you can wrap it around a wooden dowel or a PVC pipe, securing it with wire or tape.
Another option is to add corrugated cardboard tubes, which provide a fun texture for cats to rub against. You can glue the tubes onto the cat tree structure using hot glue or white glue. Another creative idea is to use an old carpet remnant and stretch it over a frame made from PVC pipes or wooden dowels.
When choosing a material, consider your cat’s preferences. Some cats love to scratch on rough textures, while others prefer smooth surfaces. By adding multiple textures, you can cater to their individual needs and create a more appealing environment for them.
Incorporating Perches and Shelves
When it comes to building a cat tree, incorporating perches and shelves is essential for creating vertical space that allows your feline friend to climb, observe, and play. These multi-level features provide a sense of security and freedom, mimicking the experience of climbing trees in the wild.
You can start by designing two or three levels of perches using wood or cardboard boxes. For a more stable base, consider using a wooden crate as the foundation for your cat tree. Attach the shelves to each other, allowing for easy access and encouraging exploration.
When choosing materials for your perches, remember that cats love scratching surfaces with texture. You can add sisal rope or carpeting to create a comfortable spot for them to lounge. Place perches at varying heights to cater to different age groups or abilities. For example, younger cats may prefer lower shelves, while older cats might need higher platforms.
By incorporating multiple levels and perches, you’ll be creating a stimulating environment that encourages natural feline behavior – all while having fun designing your DIY cat tree!
Tips and Tricks
Now that you’ve got a solid foundation for your DIY cat tree, let’s dive into some expert tips and tricks to make it purr-fectly customizable.
Common Mistakes to Avoid
When building a DIY cat tree, there are several common mistakes to avoid that can make all the difference between a safe and enjoyable experience for your feline friend. One of the most critical errors is using sharp edges or small spaces that can cause injury or get stuck.
For instance, using materials like plywood or MDF with exposed edges can be hazardous for cats who love to scratch and climb. To avoid this, opt for rounded edges or use a sanding tool to smooth out any rough surfaces. Similarly, small spaces or narrow tunnels can trap your cat’s paws or body, leading to discomfort or even injury.
Another mistake is using low-quality materials that may not support the weight of your cat or withstand their scratching and climbing antics. This can lead to collapse or structural damage, making your cat tree unsafe for use.
To avoid these mistakes, choose sturdy and durable materials like solid wood, cardboard boxes, or PVC pipes. Also, consider adding cushioning or carpeting to make the structure more comfortable and appealing to your cat.
Troubleshooting Issues
So, you’ve built your DIY cat tree and it’s not quite living up to its feline-approved potential. Don’t worry, we’ve all been there! Troubleshooting common issues is a normal part of the DIY process, and I’m here to guide you through some quick fixes for stability problems, scratching post woes, and other pesky issues.
First, let’s tackle stability. If your cat tree keeps toppling over or wobbling precariously, check if it’s properly weighted. Make sure it has a solid base that won’t easily tip – a wide, heavy bottom plate is ideal. Also, ensure all pieces are securely attached with sturdy screws and brackets.
If your scratching post isn’t getting the use you hoped for, try moving it to a more prominent location or replacing it with a taller one. Cats prefer vertical surfaces, so aim high! You can also add catnip or treats to entice them to scratch. For other issues like loose joints or damaged materials, swap out the affected parts with new ones.
In general, be prepared for some trial and error when building your DIY cat tree. Don’t be afraid to experiment and try different solutions until you find what works best for your feline friend (and your sanity).
Customizing the Design
When it comes to creating the perfect DIY cat tree for your feline friend, customizing the design is crucial. After all, every cat is unique, and what works for one may not work for another.
Start by considering your cat’s personality, size, and preferences. Does she love to climb or perch? Or perhaps she prefers a cozy hideaway? Think about the layout of your space and how you can incorporate vertical elements to make the most of it. You can repurpose old pallets, crates, or even cardboard boxes to create a one-of-a-kind cat tree that fits your style.
Don’t be afraid to get creative with materials like carpet scraps, rope, or sisal fabric for scratching posts. And if you’re feeling ambitious, try adding multiple levels or nooks and crannies for your cat to explore. Remember, the key is to have fun and make it yours! For example, you could add a hammock made from an old t-shirt or create a window perch using some rope and a wooden dowel.
By putting thought into the design, you’ll not only create a functional piece of furniture but also a cozy retreat for your cat.
Maintenance and Upkeep
To keep your DIY cat tree looking its best, let’s cover some essential maintenance tasks you’ll need to perform regularly. This includes cleaning, inspecting for damage, and making any necessary repairs.
Cleaning the Cat Tree
Cleaning the cat tree is an essential part of maintaining its longevity and keeping your feline friends healthy. Over time, cat trees can accumulate stains, odors, and dirt that can be challenging to remove. To tackle this task, start by identifying the type of stain or odor you’re dealing with. For example, if it’s a stubborn urine stain, mix 1 part white vinegar with 2 parts water and apply the solution directly to the affected area. Let it sit for about 10 minutes before wiping it clean with a damp cloth.
For tougher stains like food or dirt buildup, try using a gentle pet-safe cleaning product specifically designed for upholstery or carpets. Follow the manufacturer’s instructions carefully, as some products can damage certain materials. To eliminate lingering odors, sprinkle baking soda liberally over the cat tree and let it sit overnight before vacuuming up in the morning. Regularly inspect your cat tree for stains and odors, and address them promptly to prevent further buildup. This simple maintenance routine will help keep your cat tree clean, fresh, and a happy haven for your feline friends.
Inspecting and Repairing the Structure
As you continue to provide a cozy and comfortable home for your feline friends, it’s essential to regularly inspect and maintain their beloved cat tree. A well-maintained cat tree not only ensures stability but also longevity, saving you from costly repairs or even replacing the entire structure.
Start by checking the cat tree’s foundation and base. Make sure it’s level and securely attached to the floor. Look for any signs of wear and tear on the carpeting, sisal rope, or other materials used in its construction. Inspect the joints, screws, and bolts that hold the different components together. Check if they’re loose or damaged.
Regularly cleaning the cat tree is also crucial. Remove dirt, dust, and debris from the surfaces, especially where your cats scratch and climb. This will prevent bacterial growth and keep the structure fresh and clean. For more extensive repairs, consider replacing worn-out parts with new ones, such as carpeting or sisal rope.
Remember to inspect your cat tree every 2-3 months, depending on usage and wear. Make a habit of this routine maintenance to ensure your cats’ safety and enjoyment.
Rotating Toys and Accessories
When it comes to maintaining and keeping your DIY cat tree fresh and exciting for your feline friend, rotating toys and accessories is a crucial part of the equation. Cats can get bored with the same old toys and scratching posts, which is why regular rotation is essential.
To make it easier to rotate your cat’s toys and accessories, consider storing them in labeled bins or containers near the cat tree. This way, you can quickly swap out items when your cat seems disinterested or when you notice a decline in playtime. Try to rotate at least 2-3 times a week, or more often if your cat is particularly active.
Some ideas for rotating toys and accessories include:
• Swapping out different textures like sisal rope, corrugated cardboard, and furry mice
• Exchanging old scratching pads for new ones or switching to a different material altogether
• Introducing new dangling toys or feather teasers to keep playtime engaging
• Adding catnip-infused items or treats to stimulate your cat’s senses
By regularly rotating your cat’s toys and accessories, you’ll not only keep them engaged but also help maintain the overall health and happiness of your feline companion.
Conclusion
You’ve made it to the final stretch! Now that you have a beautiful DIY cat tree, let’s wrap up by summarizing key takeaways from your project.
Recap of Key Points
As you’ve reached the end of our DIY cat tree guide, let’s take a moment to recap the key points that will help you create a purrfect haven for your feline friend. A well-designed cat tree is essential for promoting feline happiness and providing them with the physical and mental stimulation they need.
Throughout this article, we’ve emphasized the importance of considering your cat’s unique personality, preferences, and needs when building or purchasing a cat tree. We’ve discussed how to choose the right materials and designs that will appeal to your cat’s natural instincts and provide a sense of security and comfort.
From selecting sturdy materials and durable construction to incorporating scratching posts, perches, and hiding spots, we’ve covered the essential elements of a well-designed cat tree. By following these tips, you’ll be able to create a cat tree that meets your cat’s individual needs and preferences.
Some key takeaways from our discussion include:
* Using high-quality materials and durable construction to ensure the longevity of your cat tree
* Incorporating scratching posts and pads to maintain your cat’s nail health and satisfy their natural instinct to scratch
* Providing multiple perches and levels for exercise, observation, and socialization opportunities
* Including hiding spots and enclosed spaces for cats to retreat and feel secure
By incorporating these essential elements into your DIY cat tree project, you’ll be creating a haven that not only provides physical stimulation but also promotes mental well-being and happiness. Remember, every cat is unique, so take the time to observe your feline friend’s preferences and adjust your design accordingly. With patience and creativity, you can create a DIY cat tree that will become your cat’s favorite spot in the house.
Frequently Asked Questions
How can I ensure my DIY cat tree is stable and secure for my cats?
A stable and secure cat tree is crucial to prevent accidents and ensure your feline friend’s safety. To guarantee stability, make sure to use sturdy materials, follow the design plan carefully, and consider adding anti-tip brackets or a heavy base to prevent toppling.
What are some common mistakes to avoid when building a DIY cat tree?
Common mistakes include using flimsy materials, neglecting to measure accurately, and not providing adequate support for perches and shelves. To avoid these errors, take your time with the design process, use sturdy materials, and double-check measurements before starting construction.
Can I customize my DIY cat tree with different textures and materials?
Yes! One of the benefits of building a DIY cat tree is that you can customize it to meet your cat’s preferences. Experiment with various textures like sisal rope, carpeting, or even recycled paper products to create a unique and engaging environment for your feline friend.
How often should I clean and maintain my DIY cat tree?
Regular cleaning and maintenance are essential to keep your cat tree in good condition and prevent the buildup of dust, dirt, and allergens. Set aside time each week to vacuum or wipe down surfaces, inspect for damage, and replace any worn-out materials as needed.
What if I encounter unexpected problems or issues during construction?
Don’t worry! Troubleshooting is a normal part of any DIY project. If you encounter unexpected problems, refer back to the design plan, consult online resources or experts, or ask for advice from fellow cat owners in online forums. With patience and persistence, you’ll be able to overcome challenges and complete your DIY cat tree successfully.