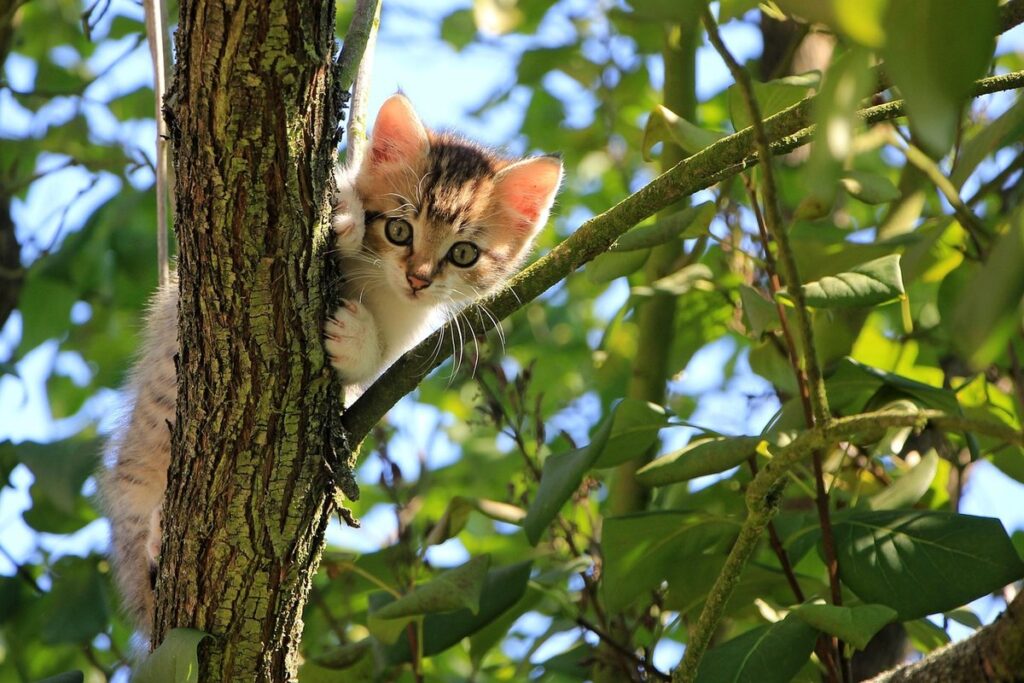
As any cat lover knows, our feline friends deserve a cozy and comfortable space to call their own. But let’s face it, store-bought cat trees can be expensive and lack that personal touch. That’s why we’re excited to share some creative and functional DIY cat tree ideas that will transform your home into a purrfect haven for your kitty.
With these budget-friendly designs, you’ll not only save money but also create a unique and cozy space tailored to your cat’s needs and personality. From planning to finishing touches, we’ll guide you through the process of building a stunning DIY cat tree using everyday materials. Whether you’re a seasoned crafter or a beginner, our expert tips and tricks will ensure a successful project that your feline companion will love.
Section 1: Planning and Designing Your Cat Tree
Before you start building, let’s talk planning! In this crucial first step, we’ll explore how to measure up your space and design a cat tree that fits both your feline friend’s needs and your home’s style.
Choosing the Right Materials
When it comes to building a cat tree, choosing the right materials is crucial for a sturdy and safe structure that your feline friend will love. You have a variety of options to consider, from wood to cardboard, PVC pipes, and more.
Wood is a popular choice due to its durability and aesthetically pleasing look. However, it can be heavy and may require additional support. Consider using reclaimed or sustainable wood to reduce waste and promote eco-friendliness. Cardboard, on the other hand, is lightweight and inexpensive but may not be as sturdy or long-lasting.
PVC pipes are another option that offers a modern and sleek design while being easy to clean and maintain. They’re also relatively affordable and can withstand heavy use. When selecting materials, think about durability, sustainability, and your budget. For example, if you have young cats or multiple pets, you may want to opt for sturdier materials like wood or PVC pipes.
Ultimately, the material you choose should reflect your cat’s preferences and your lifestyle needs.
Measuring Your Space and Cats’ Needs
Before you start building your cat tree, it’s essential to measure your available space and consider your cats’ preferences for climbing, lounging, and playing areas. Take note of the room’s dimensions, including doorways, windows, and any other obstacles that may affect the placement of your cat tree.
Measure your cats as well! You’ll want to make sure there’s enough space for them to comfortably climb in and out of their favorite perches. A general rule of thumb is to provide at least 12-18 inches of clearance on either side of the cat tree, depending on its size and design.
Consider your cats’ individual personalities and preferences when designing your cat tree. Do they love to climb? Provide multiple levels or a sturdy rope perch for them to scale. Are they laid-back loungers? Incorporate large, plush cushions or hammocks for them to snooze the day away.
Think about how you can incorporate vertical space into your design. Wall-mounted shelves or cat condos can be an excellent way to maximize your room’s layout while keeping your floors clear. By measuring your space and considering your cats’ needs, you’ll end up with a custom cat tree that meets their unique preferences and fits seamlessly into your home.
Sketching Your Cat Tree Design
Now that you’ve decided to create your own DIY cat tree, it’s time to start thinking about what shape and size it should be. But before you grab a pencil and paper, take a moment to consider the space where your cat tree will live. Measure the area where you plan to place it, taking note of any obstacles or windows that could impact the design.
As you sketch out your cat tree design, think about what features are must-haves for your feline friend. Do they love to perch and survey their kingdom? Include a sturdy platform or two in your design. Are they scratchers? Consider adding some vertical or horizontal scratching posts made from materials like sisal rope or carpet.
Don’t forget about hideaways – many cats adore having a cozy spot to curl up and snooze. You can incorporate these into your design by adding boxes, tunnels, or even a hammock. Remember to leave space for easy cleaning and maintenance, as well as any electrical outlets or switches that might be nearby.
Section 2: Building a Basic Cat Tree Structure
Now that you’ve got your measurements and materials, let’s dive into building the basic structure of your cat tree. This is where it all starts to come together!
Frame Construction
When it comes to building a sturdy cat tree, a solid frame is essential for support and stability. To create the basic frame of your cat tree using wood or PVC pipes, start by measuring out the dimensions you need. Consider the space where the tree will sit and the height you want the tree to reach.
Cut two pieces of material (wood or PVC) to serve as side frames, making sure they are slightly taller than the final desired height. Next, cut a few more pieces for the top and bottom plates, which will provide stability and support to the entire structure.
Assemble the frame by attaching the side pieces to the top and bottom plates using screws or connectors. Make sure everything is level and secure before moving on to the next step. Use clamps to hold the pieces together while you attach them, ensuring a sturdy bond between the components. With this basic frame in place, you’ll have a solid foundation for adding the rest of your cat tree’s features, such as perches, scratching posts, and cozy hideaways.
Adding Supports and Platforms
When it comes to adding supports and platforms to your DIY cat tree structure, there are several options to consider. Wooden dowels can provide a sturdy foundation for your cat’s perches, while also allowing for easy customization of the layout. Simply place the dowels into the wooden legs or columns of your cat tree, spacing them evenly apart to create a stable base.
For added comfort and visual appeal, carpeted perches are an excellent choice. These can be attached directly to the supports using hot glue or adhesive, creating cozy nooks for your feline friends to lounge in. To ensure optimal space utilization, consider staggering the platforms at different heights to cater to cats of varying ages and abilities.
Remember, the goal is to strike a balance between providing ample room for climbing and exploring, while also preventing overcrowding that can lead to territorial disputes or accidents. By spacing these features thoughtfully, you’ll create a dynamic cat tree structure that meets the unique needs and preferences of your feline companions.
Integrating Scratching Posts and Pads
When it comes to building a basic cat tree structure, incorporating scratching posts and pads is an essential element to provide your feline friends with a comfortable and healthy space. There are various types of materials you can use for this purpose, each catering to different preferences.
For instance, sisal rope is a popular choice among cat owners due to its durability and resistance to shedding. You can wrap the sisal rope around a wooden post or attach it to a vertical surface to create a sturdy scratching area. Another affordable option is corrugated cardboard, which cats often find appealing due to its texture and smell.
Carpeted surfaces are also an excellent choice for cat trees. Opting for carpet remnants from pet stores or leftover fabric can save you money while still providing your cats with a cozy spot to scratch and lounge. When choosing materials, consider the individual preferences of your feline friends. Some may prefer rougher textures, while others enjoy softer surfaces. Experiment with different options to find what works best for your household.
To ensure the scratching posts and pads stay in place, attach them firmly using screws or nails. This will prevent them from toppling over during playtime or accidental bumps from your cats.
Section 3: Customizing Your Cat Tree with Features and Details
Now that you’ve built your cat tree, it’s time to think about the details – from scratching posts to cozy hideaways, let’s get creative! We’ll explore how to customize your project.
Hideaways and Tunnels
When it comes to designing a cat tree that truly meets your feline friend’s needs, hideaways and tunnels are essential features. Cats love to curl up in enclosed spaces where they can feel safe and secure. To add these areas to your DIY cat tree design, consider using fabric or cardboard enclosures.
Fabric enclosures can be created using old t-shirts, towels, or even a large piece of fleece. Simply drape the material over a frame or attach it to the cat tree’s structure with some sturdy stitching. Cardboard tunnels are another affordable option – simply cut out holes for entry and exit points and arrange them within the tree’s framework.
To make these areas cozy and inviting, consider adding soft bedding like blankets or plush toys. You can also incorporate scratching posts or pads near the hideaways to provide your cat with a comfortable place to scratch before curling up. Remember, it’s all about creating a snug retreat that makes your cat feel at ease – so don’t be afraid to get creative and tailor these areas to their unique preferences!
Perches and Shelves
When it comes to adding perches and shelves to your DIY cat tree, there are countless options to suit every feline’s taste. For a more traditional look, consider using wooden boards of varying thicknesses and widths. These can be placed at different heights to cater to cats of all ages and abilities. You might want to include a lower shelf for kittens or senior cats that need easier access.
Rope hammocks are another great addition, providing a cozy spot for your cat to lounge and relax. Simply attach the hammock to two sturdy supports, making sure it’s secure enough to hold your cat’s weight. For a more rustic feel, you can use wicker baskets or woven storage containers as shelves.
Remember to position these features at comfortable heights and angles that allow your cat to easily access them. A general rule of thumb is to place perches and shelves at about 12-18 inches apart, with the highest shelf no more than 3-4 feet from the ground. This will encourage vertical climbing and exploration without putting your cat in a vulnerable position.
Lighting and Sensory Features
Adding lighting and sensory features to your cat tree design can take it from a basic structure to an engaging playground for your feline friends. LED lights, for instance, can be used to create a cat’s eye view effect by positioning them at the top or sides of the tree. This not only adds visual appeal but also provides cats with a sense of security and comfort.
Bells and other noise-making elements can be incorporated into the design to stimulate your cat’s auditory senses. You can attach bells to the branches, post, or even add a bell-shaped toy to keep things interesting. Some cat owners even opt for music boxes that play soothing melodies when triggered by their cat’s paws.
Texture elements like sisal rope and carpeted surfaces are also great additions to your cat tree design. Cats love to scratch, stretch, and rub against different textures, which can help maintain their nail health and satisfy their natural scratching instinct. Consider using a combination of materials for a more dynamic experience – perhaps sisal rope on the scratching posts and carpeted surfaces for lounging areas.
Section 4: Finishing Touches and Maintenance
Now that your DIY cat tree is built, let’s focus on adding those finishing touches to make it even more appealing to your feline friends. We’ll also cover some essential maintenance tips.
Upcycling and Repurposing Materials
When it comes to creating a one-of-a-kind cat tree design, getting creative with materials is key. Why not repurpose items from around the house that would otherwise end up in the trash? An old bookshelf or ladder can be transformed into a sturdy base for your cat’s climbing tower.
Think about what you have lying around – an old door, a wooden pallet, or even an antique window frame. These unique materials can add character to your cat tree and make it stand out from store-bought versions. For example, you could use the slats of an old ladder as perches for your cat to lounge on.
To get started, take stock of what you have available and think about how each item can be repurposed. You might need a little creativity and elbow grease to disassemble or reconfigure them, but the end result will be worth it. Don’t be afraid to mix and match different textures, shapes, and sizes to create a truly one-of-a-kind design that reflects your personal style.
Painting and Decorating Your Cat Tree
When it comes to painting and decorating your cat tree, you want to create a space that’s not only visually appealing but also stimulating for your feline friend. Cats have unique preferences when it comes to colors, patterns, and textures, so let’s dive into the world of cat-friendly design.
Start by considering your cat’s natural instincts: they’re drawn to warmth, comfort, and security. Choose colors that evoke these feelings, such as earthy tones like beige, brown, or taupe. For a more dramatic look, try rich jewel-tones like emerald green or sapphire blue – cats love the contrast of dark colors against lighter backgrounds.
When it comes to patterns, think about what will stimulate your cat’s senses. Cats have excellent low-light vision, so opt for bold textures and patterns that create visual interest, such as stripes or swirling designs. Avoid highly reflective surfaces or shiny finishes that might startle them.
To ensure the safety of both you and your cat, use non-toxic paints and materials specifically designed for pet-friendly environments. Look for water-based acrylics or plant-based stains that are free from harsh chemicals and odors. With a little creativity and planning, you can create a beautifully decorated cat tree that becomes the centerpiece of your home’s feline fun zone!
Cleaning and Maintaining Your Cat Tree
Cleaning and maintaining your cat tree is an essential part of ensuring its longevity. Over time, the surfaces can accumulate dirt, dust, and hair, making it less appealing to your feline friend. Regular cleaning can help keep your cat tree looking new and prevent the growth of bacteria and odors.
Start by washing any removable parts, such as cushions or hammocks, with a mild detergent and warm water. This will not only clean the surface but also reduce dust mites and allergens. Use a soft-bristled brush to gently sweep away loose debris from the scratching posts and other surfaces.
Dusting is crucial in maintaining your cat tree’s overall health. Use a microfiber cloth or a duster with an extension pole to reach all areas, including the top and bottom of the tree. Regularly inspect the cat tree for worn-out materials, such as torn fabric or loose joints. Replace these parts promptly to prevent further damage.
By incorporating regular cleaning and maintenance into your routine, you can extend the life of your cat tree and keep it a happy haven for your cats.
Section 5: Safety Considerations and Troubleshooting
Now that you’ve built your purrfect cat tree, it’s time to think about safety and potential issues that might arise – we’re covering those concerns next.
Ensuring Stability and Balance
When it comes to building a cat tree, stability and balance are crucial for ensuring the safety of both your feline friend and yourself. You don’t want your cat tree to tip over, causing damage to your furniture or worse, injury to your cat.
To prevent this from happening, consider using anti-tip brackets or securing your cat tree to the floor. Anti-tip brackets can be attached to the legs of your cat tree and screwed into the floor, providing extra stability and preventing the unit from tipping over. Alternatively, you can use heavy-duty screws to screw the cat tree directly into the floor.
Another important aspect to consider is the weight distribution of your cat tree. Make sure that the heavier components, such as the base or shelves, are securely attached and won’t shift during use. You can also add weights or sandbags to the base for extra stability. By taking these simple precautions, you’ll be able to enjoy a sturdy and safe cat tree for years to come.
Remember, it’s always better to err on the side of caution when it comes to building a cat tree. Take your time, and don’t be afraid to add extra supports or reinforcements as needed.
Addressing Common Issues and Concerns
When building your DIY cat tree, you may encounter some common issues that can be frustrating to deal with. One of the most common complaints is scratching posts being too small for cats, leading them to scratch nearby surfaces instead. To avoid this problem, make sure to choose a scratching post that’s sturdy and tall enough for your feline friend to stretch out on comfortably.
Another issue you may encounter is perches being too narrow or unstable, causing your cat to wobble or fall off. To prevent this, use thicker wooden planks or consider adding non-slip mats to the perches for extra grip. You can also experiment with different materials like carpeted steps or sisal rope-covered platforms.
Some cats may even have trouble accessing certain areas of their tree due to narrow staircases or tight spaces. If you notice your cat having difficulty navigating the cat tree, try widening the stairs or adding more support beams for easier access. By addressing these common issues ahead of time, you can create a safer and more enjoyable space for your feline companion.
Section 6: Showcasing Your Finished Cat Tree
Now that you’ve crafted your feline masterpiece, it’s time to show off your finished cat tree and make those Whisker Wednesday dreams a reality. Let’s take a look at how to showcase your creation in style.
Taking Photos and Sharing Your Design
When you’ve finally finished your DIY cat tree project, it’s time to show off your handiwork! Taking high-quality photos of your design is essential to showcase its features and details. Start by using natural light, which will help bring out the colors and textures of your materials. Take photos from multiple angles, including a full-body shot, close-ups of the cat beds or perches, and any unique features like climbing walls or dangling toys.
Consider using a tripod to ensure steady shots, especially if you’re photographing larger pieces. You can also use a macro lens or a smartphone with a good camera to capture intricate details. Don’t forget to include yourself in the photos – holding your cat tree near your finished product or even building it with your cat nearby can make for great social media posts.
When sharing your design, start by posting on your personal social media accounts like Instagram and Facebook. Use relevant hashtags like #diycatfurniture or #catlovers to reach a wider audience. You can also share photos with friends and family who appreciate handmade crafts, and consider submitting your project to DIY or crafting communities for feedback and recognition.
Encouraging User Feedback and Suggestions
When it comes to perfecting your cat tree design, there’s no better resource than fellow feline enthusiasts. By encouraging user feedback and suggestions, you can refine and improve your creation, making it the purr-fect haven for cats everywhere.
Consider hosting a giveaway or contest where people can share their ideas and vote on their favorite features. This not only generates buzz around your cat tree but also gives you valuable insights into what works and what doesn’t. For instance, you could ask participants to suggest new materials, textures, or even entirely new design elements.
You could also create a forum or social media group where users can share their experiences, provide feedback, and make suggestions for improvement. This not only helps you refine your design but also builds a sense of community among cat lovers who appreciate the effort and care that goes into creating such structures.
By incorporating user input, you can tailor your cat tree to meet the unique needs and preferences of cats, ensuring it’s both functional and adorable. So don’t be afraid to ask for help – it’s all part of making your cat tree truly special!
Section 7: Conclusion and Final Thoughts
Now that you’ve created your DIY cat tree, let’s wrap up by reviewing the fun projects we’ve covered and sharing a few final thoughts on why they’re purr-fectly amazing.
Recap of DIY Cat Tree Process
Now that you’ve successfully built and assembled your DIY cat tree, let’s take a step back and recap the process. From planning and designing to finishing touches and maintenance, creating a purrfect haven for your feline friends is easier than you think.
You started by gathering inspiration from various designs, considering your cat’s size, preferences, and play style. This was followed by measuring out your materials and creating a detailed plan, taking into account any obstacles or limitations in your home. With your design finalized, it was time to get creative with materials like wood, carpet, and sisal rope, carefully cutting and assembling each piece to bring your vision to life.
Once assembled, add some finishing touches by placing plush toys, scratching posts, and cozy beds throughout the structure. Don’t forget to test it out with your cat to ensure they’re comfortable and enjoying their new retreat. Regular maintenance is key to keeping your DIY cat tree in top condition – simply vacuum or brush off any dust or debris, and replace worn-out materials as needed.
By following these simple steps, you’ve not only created a unique and functional space for your cat, but also saved money and developed a valuable skill.
Encouragement to Get Creative and Build Your Own
Now that you’ve seen the various DIY cat tree ideas and designs, we hope you’re feeling inspired to get creative and build your own unique cat tree masterpiece. Remember, the best part about building a cat tree is that it’s completely customizable to your feline friend’s preferences and your home’s decor.
Don’t be afraid to think outside the box (or cardboard box, in this case!) and incorporate materials you already have on hand. You might be surprised at how easily an old pallet or some leftover fabric can transform into a cozy cat bed or a sturdy support beam for a multi-level tree.
As you start brainstorming your design, consider what features are most important to you and your cat. Do they love to climb? Add some sturdy perches and scratching posts. Are they more laid-back? Create a plush den or two for them to snooze in style. The possibilities are endless, and we’re confident that with a little imagination, you’ll create the purrfect cat tree for your home.
Frequently Asked Questions
Can I use a combination of materials to build my DIY cat tree?
You can definitely mix and match materials to create a unique and sturdy structure. For example, you might use wood for the frame and cardboard or PVC pipes for additional supports. Just be sure to choose materials that are safe and durable enough for your cat’s weight and playstyle.
How do I ensure my DIY cat tree is stable and secure?
Stability is crucial when building a cat tree! To avoid any accidents, make sure to use sturdy materials, follow proper construction techniques, and attach the structure firmly to the floor or wall. You can also add extra supports or weights for added security.
What if I have limited space – can I still build a DIY cat tree?
Don’t worry about having limited space! You can create a compact yet functional cat tree using wall-mounted shelves, corner units, or vertical designs that don’t take up too much floor space. Consider measuring your space carefully and sketching out different layouts to find the perfect fit.
How do I make my DIY cat tree more appealing to multiple cats?
When building for multi-cat households, it’s essential to provide separate areas for each cat to relax, play, or retreat. You can create individual hideaways, scratching posts, or perches to cater to their unique needs and personalities. Just remember to add enough space and features to keep them happy and engaged.
Can I customize my DIY cat tree with personal touches?
Absolutely! Personalizing your cat tree is all about adding a touch of love and personality to the design. You can use fabric, paint, or other materials to create custom scratching pads, hideaways, or perches that reflect your cat’s favorite colors or patterns. Don’t be afraid to get creative and make it uniquely yours!