Are you ready to unleash your inner artist and bring some feline flair to your drawings? Drawing realistic cat paws can be a fun and rewarding challenge, but it requires a good understanding of anatomy and basic shapes. In this step-by-step guide, we’ll take you through the process of creating detailed and textured cat paws that will make any feline enthusiast purr with delight.
We’ll start by covering the basics of cat paw anatomy, from the pads to the claws, and then move on to advanced techniques for adding texture and depth to your drawings. By the end of this guide, you’ll be able to create realistic cat paws that will enhance any drawing or illustration, making it perfect for artists, cat lovers, and anyone looking to add some realistic details to their work.
Understanding Feline Anatomy
Let’s dive into the fascinating world of feline anatomy, where we’ll explore the unique characteristics of cat paws and what makes them so intriguing to draw.
Recognizing Key Features of Cat Pads
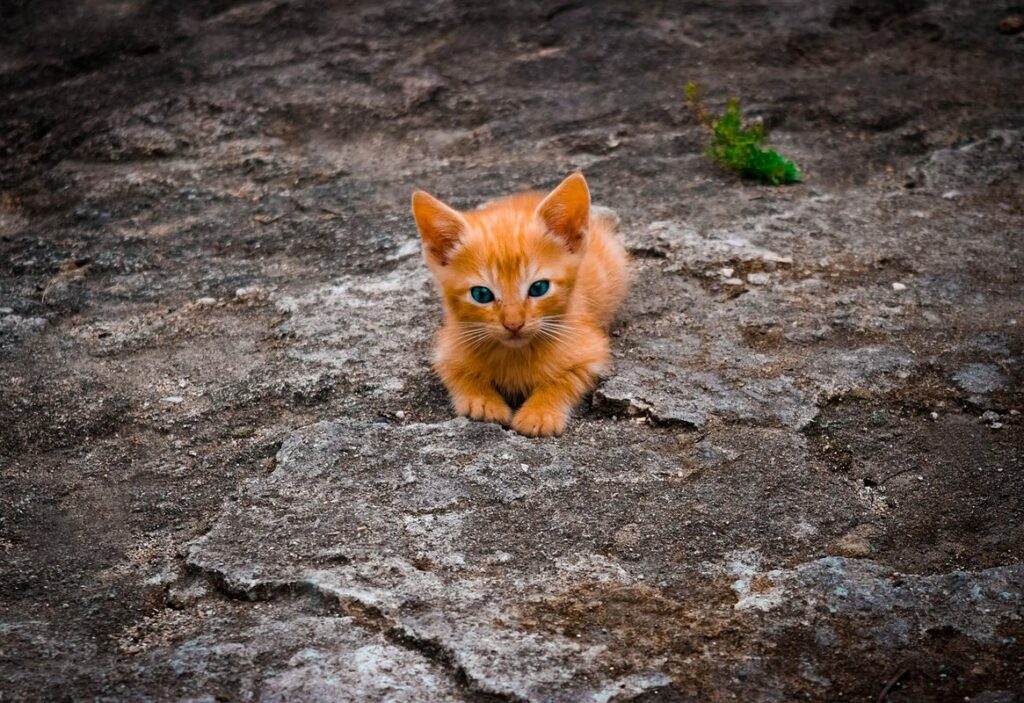
When drawing cat paws, it’s essential to get the anatomy right. Let’s start with the most distinctive feature: the pads. A cat’s paw is covered with four main pads – one on each toe and a larger pad on the heel of the foot. These pads are thicker in the center than towards the edges and have a smooth texture. They act as shock absorbers, helping cats to grip surfaces while walking or running.
The toes themselves are long and slender, with five toes in total (including the dewclaw). The middle two toes are usually the longest and most prominent. Claws protrude from the ends of each toe, providing traction and protection for the cat’s paws. Understanding the basic anatomy of a cat’s paw is crucial for drawing realistic paws.
For instance, if you want to draw a cat standing on its hind legs, make sure the front paws are slightly angled backwards. This is because cats use their back paws as push-off points when they jump or stand up. By observing the pads, toes, and claws of real-life cats, you can get an idea of how these features interact with each other to create a balanced and natural-looking paw.
Analyzing Paw Shapes and Sizes
When it comes to drawing cat paws, understanding their unique shapes and sizes is crucial for creating accurate representations. Each breed of cat has distinct paw characteristics that can be identified with practice.
Let’s start by examining the general shape of a feline paw. The majority of cats have oval-shaped paws, but some breeds like the Sphynx have more rounded or teardrop-shaped paws due to their lack of fur and skin folds. Meanwhile, breeds such as the Maine Coon tend to have larger, more rectangular-shaped paws.
To identify the paw shape of a particular breed, observe the toe alignment and digit ratio. For instance, some cats have toes that are aligned closely together (known as “toe-curlers”), while others may have a more spread-out toe arrangement (referred to as “splay-toed” cats).
Focusing on size, domesticated cats typically have smaller paws compared to their wild counterparts. While larger breeds like the Savannah can have bigger paws, the overall paw length and width will vary depending on breed characteristics.
When drawing cat paws, it’s essential to keep these differences in mind and study reference images of specific breeds to get a better understanding of their unique features.
Basic Shapes and Proportions
To draw a cat paw, you’ll need to start with basic shapes and proportions. Let’s break down the oval shape of the pad and the curve of the toes.
Creating a Basic Oval Shape
To create a basic oval shape for your cat’s paw, start by holding your pencil at a 45-degree angle and lightly sketch an oval with the major axis (longest diameter) parallel to the ground. Imagine the oval as being slightly elongated, with the top end being more pointed than the bottom. This is crucial in capturing the natural proportions of a cat’s paw.
Begin by drawing the overall shape, focusing on getting the proportions right rather than worrying about details like fur or claws. To do this, visualize the oval as being made up of two connected egg shapes, one smaller and one larger. The top half of the oval should be slightly narrower than the bottom half.
Pay attention to the position of your pencil tip as you draw, keeping it light and gentle on the paper. As you refine the shape, remember that a cat’s paw is typically wider at the base than at the toes. Practice drawing ovals with different proportions until you feel comfortable creating one that looks like a cat’s paw.
Understanding Toe and Claw Placement
When drawing cat paws, it’s essential to get the toe and claw placement right. This might seem simple, but it can make a big difference in creating a realistic-looking paw.
To start, think of the paw pad as a roughly oval or oblong shape. The toes will be placed along the shorter axis of this oval, with the largest toe (the hallux) usually positioned on the outer edge. Imagine drawing a horizontal line through the center of the oval to help guide your placement.
The claws should be attached to the end of each toe, and their angle can give away whether your cat is relaxed or tense. For a relaxed pose, the claws will likely be pointing downwards slightly, while for a more tense pose, they might be pointing outwards at a steeper angle.
To get a better sense of claw placement, try drawing the paw in different poses – sitting, standing, and even curled up. Pay attention to how the claws relate to each other, and don’t be afraid to experiment with slight variations until you feel comfortable with the basic shapes involved.
Drawing the Paw Pads
Now that you’ve drawn the paw shape, it’s time to add the pads! In this next step, we’ll break down how to create those adorable little toe pads.
Creating Texture with Hatching and Cross-Hatching
When it comes to drawing cat paws, texture is key. It’s what makes their pads look soft and furry, while also giving them a tactile feel. Two essential techniques for creating texture are hatching and cross-hatching.
Hatching involves creating closely spaced parallel lines that follow the shape of the paw pad. The closer together these lines are, the more detailed and textured your drawing will appear. For example, if you’re drawing the heel of the paw, you might use short, tight hatches to suggest the rough skin there. If you’re drawing the ball of the foot, you could use longer, more flowing hatches to suggest the softer skin.
Cross-hatching takes this a step further by layering lines at different angles over one another. This creates a range of values and textures in your drawing, from smooth to rough. By adjusting the density and direction of these layers, you can achieve everything from fine furrows to thick calluses.
Suggesting Pad Depth with Shading Techniques
When drawing the paw pads on a cat’s foot, it can be challenging to convey depth and dimension using traditional shading methods. However, there are some clever techniques you can employ to create the illusion of depth.
One effective way to suggest pad depth is by using gradient maps. By adjusting the settings in your graphics software, you can create a subtle transition from light to dark across the paw pad. This will give the impression that the pad is curved and convex, rather than flat. For example, you could set the gradient map to a gentle fade from 50% gray to 20% gray, which will suggest a shallow concavity.
Another technique is to use layer blending modes to create a sense of depth. By combining a dark overlay layer with a layer filled with a soft brush texture, you can create a convincing illusion of pad curvature. This method works particularly well for creating the impression of deep creases and folds in the paw pad. Experiment with different blending modes and settings to achieve the desired effect.
Adding Details to Your Cat Paw Drawings
Now that you’ve got a good foundation of basic cat paw shapes, let’s add some personality to your drawings with finer details and textures.
Crafting Accurate Claw Shapes and Sizes
When it comes to adding details to your cat paw drawings, one of the most important aspects is getting the claws just right. Realistic claw shapes and sizes vary greatly between breeds, so let’s dive into how to craft accurate and believable claws for your feline subjects.
To start, observe the different types of claws found in various breeds. Some cats have retractable claws, while others have them permanently extended. Research pictures of cat paws from different breeds to get a sense of their unique claw characteristics. For example, Maine Coon cats are known for their large, sturdy claws, while Singapura cats have tiny, almost vestigial claws.
When drawing claws, pay attention to proportion and detail. Use a range of line weights to suggest depth and dimension. For retractable claws, draw the claw in its resting position, curved slightly inward towards the paw pad. You can also indicate the presence of a claw by simply sketching a small oval shape where it would be located on the paw.
To vary claw sizes and shapes, experiment with different line weights and proportions. Remember that larger cats have thicker, more robust claws, while smaller cats have thinner, more delicate ones. By paying attention to these details, you’ll add an extra layer of realism to your cat paw drawings.
Drawing the Nail Beds and Cuticles
When drawing the nail beds and cuticles of your cat’s paw, it’s essential to capture their delicate texture and subtle curves. To achieve this, start by lightly sketching the shape of each nail bed, making sure they’re slightly recessed from the overall pad. Pay attention to the curve of each nail, as it should be more pronounced in the center.
To create a sense of depth, use gentle hatching lines along the edges of each nail bed, following the contours of the cat’s paw. These lines should be subtle and delicate, avoiding any harsh strokes that might detract from the overall softness of the drawing.
When drawing the cuticles, focus on capturing their slight curvature and the way they blend seamlessly into the surrounding skin. Use short, gentle strokes to suggest the texture of the cuticles, applying more pressure towards the tip of each nail.
Remember, it’s the small details like these that bring your cat paw drawings to life. By taking the time to carefully capture the nail beds and cuticles, you’ll create a drawing that truly captures the essence of your feline friend.
Advanced Techniques for Realism
Now that you’ve mastered the basics of drawing cat paws, let’s take your skills to the next level by diving into some advanced techniques that will give your artwork a more realistic look.
Capturing Claw Movement with Gesture Drawing
Capturing the dynamic movement of cat claws is an essential aspect of rendering realistic feline paws. One effective way to convey energy and fluidity is through gesture drawing. To apply this technique, start by observing how a cat’s claw moves when it’s stretching or grasping something.
Observe that the movement of a cat’s claw resembles a fluid, curved line rather than a stiff, straight one. This subtle distinction can make all the difference in capturing its dynamic nature. When using gesture drawing to capture claw movement, try to focus on conveying energy and momentum through loose, expressive lines.
To practice this technique, set a timer for 1-2 minutes and quickly sketch the cat’s paw from different angles, focusing on the way the claws move and interact with one another. The goal is not to create a precise representation but rather to capture the essence of movement. By doing so, you’ll develop your ability to convey dynamic energy in your feline paws drawings.
Enhancing Paw Details with Reference Images
When it comes to drawing cat paws, one of the most crucial steps is getting those delicate details right. To achieve realism, you need to focus on the intricate textures and patterns that make each paw unique. This is where reference images come into play – they’re essential for capturing the subtleties of your feline subject’s feet.
You can find reference images in various sources: Google, Pinterest, or even take your own photos of real cat paws (with permission from their owners, of course!). Look for images that showcase different breeds, ages, and lighting conditions. Study how the texture of the fur changes depending on the angle of the light. For example, a photograph taken directly under a bright lamp will reveal the intricate patterns on a cat’s paw pads.
To use reference images effectively, practice observing small details such as the shape of the claws, the direction of the hair growth, and the subtle ridges on the paw pad. Transfer these observations onto your paper by breaking down complex textures into smaller components. This technique will help you create more convincing and realistic cat paws in your drawings.
Tips for Drawing Cat Paws from Different Angles
Now that you’ve got a solid grasp on drawing cat paws in general, let’s dive into some specific tips for capturing them from different angles. This will help your artwork feel more dynamic and realistic!
Creating Depth with Atmospheric Perspective
When drawing cat paws from different angles, it’s essential to consider the surrounding environment and create depth through atmospheric perspective. Atmospheric perspective is a technique used to suggest distance and space behind a subject by manipulating color, contrast, and detail.
To achieve this effect, start by observing how colors change as they recede into the background. Warm colors tend to advance, while cool colors appear more muted in the distance. Apply this principle to your cat paw drawing: use warm tones for objects in the foreground, such as the cat’s fur, and gradually shift to cooler tones for objects in the background.
Consider the example of a cat sitting on a carpeted floor with a few toys scattered around it. Use subtle gradient effects or soft brushstrokes to suggest the texture of the carpet receding into the distance. For items like toys or walls, use simpler shapes and reduced detail as they move further away from the viewer.
Experimenting with Unconventional Viewpoints
When experimenting with unconventional viewpoints for drawing cat paws, it’s essential to think outside the box and push the boundaries of traditional representation. One way to achieve this is by using abstract shapes to capture unique moods. For instance, you could depict a cat’s paw as a soft, amorphous blob, emphasizing its texture rather than its shape. This approach works particularly well for conveying a sense of relaxation or calmness.
To take it up a notch, try emphasizing textures over details. Use bold brushstrokes or expressive lines to capture the intricate patterns on your feline friend’s paw pads. This not only creates a visually striking image but also adds an extra layer of depth and character to your drawing. For example, you could render the paw as a mosaic of interlocking shapes, each one highlighting a distinct texture.
Remember, the key to experimenting with unconventional viewpoints is to let go of traditional notions of what constitutes a “paw.” By embracing abstraction and emphasizing textures, you’ll unlock new possibilities for capturing the essence of your feline subject. Experiment freely, and see where this approach takes you!
Final Touches: Refining Your Cat Paw Drawings
Now that you’ve got a great foundation for your cat paw drawings, let’s add some final details to make them truly purr-fect! This is where attention to texture and proportion will really bring it all together.
Setting Up for a Professional Finish
When you’re nearing completion on your cat paw drawing, it’s time to think about adding those final details that will make your artwork truly pop. One of the key ways to refine your piece is by experimenting with layer blending modes. These modes allow you to combine multiple layers of different colors and textures, creating a richly detailed appearance.
For instance, you can use the “multiply” mode to add depth to your cat’s fur, while the “overlay” mode allows for subtle texture overlays that mimic real fur. To implement this, simply select each layer individually and adjust the blending mode in the layers panel. This technique is particularly useful when attempting to convey realism.
Another technique worth exploring is adding subtle textures to give your drawing a more tactile feel. You can use layer styles or even third-party plugins to add grainy texture overlays that catch the light just so. Remember, these details should enhance rather than overwhelm the overall design – balance is key.
Conclusion and Next Steps
As you complete your cat paw drawings, take a moment to reflect on what you’ve learned and accomplished. You’ve mastered the basic shapes, explored different breeds’ characteristics, and practiced shading techniques to bring depth and dimension to your artwork.
Recap of Key Takeaways:
- Understand the fundamental shapes that make up a cat’s paw
- Familiarize yourself with various breeds’ distinct features
- Practice shading techniques for realistic textures and depths
Now that you have a solid foundation in drawing cat paws, continue refining your skills with additional learning resources. Some recommended books include “The Art of Animal Drawing” by Ken Hultgren and “Draw 50 Animals” by Lee J. Ames.
For online tutorials and courses, websites like Skillshare and Craftsy offer an array of classes on animal drawing and specific techniques such as shading. YouTube channels like Proko and Art Camp are also excellent resources for mastering figure drawing, including paws.
Remember, practice is key to improvement. Continue experimenting with different breeds, techniques, and styles to develop your unique voice in cat paw drawing.
Frequently Asked Questions
How do I ensure accurate proportions when drawing cat paws from different angles?
To avoid proportion errors, measure the length of your subject’s paw or consult reference images to establish a baseline for each dimension (e.g., toe length, pad thickness). When drawing from unusual viewpoints, remember that cat paws are generally symmetrical. Measure and mark key points on your paper before beginning to draw, ensuring accurate placement and proportions.
Can I use digital tools to create realistic cat paws?
Yes. Digital art software like Adobe Photoshop or Procreate can be incredibly useful for creating detailed cat paws with texture and depth. Experiment with layering techniques, brushes, and textures to achieve a lifelike appearance. Keep in mind that mastering these tools takes practice, but the results can be stunning.
What if I’m struggling to capture the texture of cat paw pads?
Capturing texture often requires a combination of basic shapes (e.g., ovals, rectangles) and hatching techniques. Start by creating a smooth oval for the pad’s center and gradually increase texture intensity towards the edges. Use gentle, layered strokes with your chosen medium to build up depth without overwhelming the overall design.
Can I draw cat paws from memory or should I always use reference images?
While experience and practice can help you commit certain details to memory, it’s generally best to use reference images when drawing realistic cat paws. This ensures accuracy in anatomy and texture, which are crucial for creating believable drawings. Supplement your own experience with visual aids to capture the nuances of feline paw anatomy.
How do I achieve a more subtle approach to shading for suggesting pad depth?
Rather than relying on harsh contrasts or dark shadows, experiment with softening edges using layer blending modes or subtly graded pencils (HB-6B). Build up gradual transitions from light to dark, allowing your viewer’s eye to perceive the pad’s natural contours. This gentle approach will add a more realistic dimension to your drawings without overpowering them.